Posts

Showing posts from December, 2018

Felt Christmas Ornaments

Image
I've always admired the handiwork of other crafters who make embroidered felt things. They're just so adorable! I had snagged some felt off of My Favorite Things a few months back, during one of their retirement sales. As I was scrolling through the black hole that is Pinterest, I saw several gorgeous felt ornaments. I remembered about the felt and immediately started digging through my die stash for ideas. Thankfully, I have a few basic shape sets that worked perfectly for the bases. My Sizzix Big Shot cut through the felt like a dream. After I die cut out all my shapes, I set out on stitching them up. Now, I'm not the best at embroidery -- I don't have a whole lot of practice. But with each ornament, I felt like I got just a little bit better at it. These are far from perfect, but it adds to the "homey-ness" of them, I think. If anything, I hope that one day my boys will put them on their own Christmas trees and remember their crazy, imperfect mama, who l

Homemade Soap

Image
I made my own soap! I was planning on making some as gifts, but offered up my extras on Facebook. I had a HUGE response, so I'll be making more this week, evidently. They are super easy to make! I followed this recipe . Merry Christmas!

Modern Christmas Card

Image
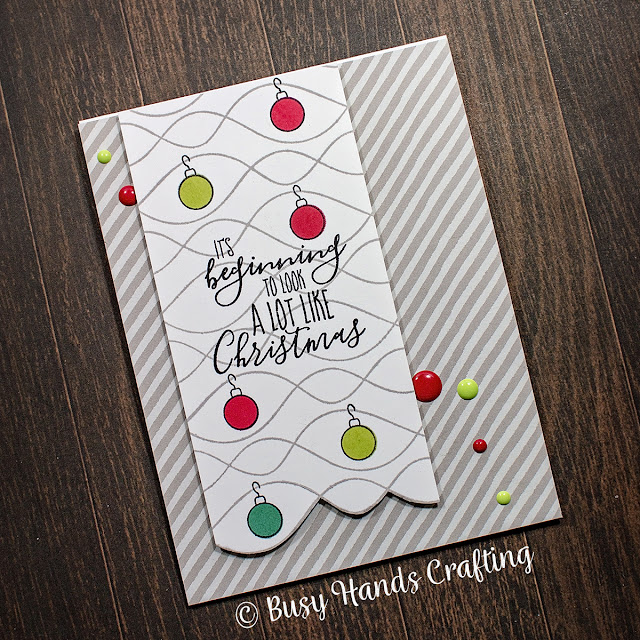
As I was finishing addressing my Christmas cards, I realized I needed one more -- oops! So, I made this quick, modern take on Christmas. Just stamped the background, stamped the ornaments, stamped the sentiment, popped the panel up on foam tape, and finished the card off with some enamel dots. NOW I'm done! Products Used: Concord & 9th O Christmas Tree MFT Whimsical Waves Background MFT Painted Prints Smitten 6x6 Paper Pack MFT Premium Dye Inks VersaFine Ink

Ornament Card

Image
My very last Christmas card this year -- lucky number 15! Whew! I die cut the ornaments and scalloped panel, adhered the ornaments to the scalloped panel, stamped my sentiment, and then popped the whole thing up with foam tape. Super simple. Products Used: MFT Filled with Joy MFT Die-namics Stitched Scallop Basic Edges MFT Hand Lettered Holiday MFT Petite Plaid 6x6 Paper Pack

Joyful Snowman Card

Image
So fun! I die cut the letters, snowman parts, and scalloped panel first. Then I stamped my background using the same color ink as the card stock for a tone-on-tone look. I then finished it off with some shimmer pen for some interest. Products Used: MFT Filled with Joy MFT Die-namics Stitched Scallop Basic Edges SSS Gingham Background MFT Premium Dye Ink VersaFine Ink Nuvo Aqua Shimmer Pen

Peace Card

Image
This card is SO much prettier in real life! I heat embossed the sentiment and trees first and then did some ink blending in various blue tones. I then flicked white watercolor onto my panel, added the sparkly star, and adhered it to my dark blue card base. I just love it! Products Used:  SSS Big Peace Tim Holtz Tree Line MFT Filled with Joy VersaMark Ink WOW Embossing Powder Distress Inks Kuretake Watercolors

Double-Thick Cuff Hat

Image
Made a comfy winter hat for my stepmom. Pattern: Double-Thick Cuff Hat  by Staci Perry Needle Size:  US 6 - 4.0 mm Yarn:  Knit Picks Wool of the Andes Tweed

1898 Hat

Image
I heavily modified this pattern to both fit my dad and satisfy his requests for a hat that would cover his ears and the back of his neck. He has about a 25 inch head, so used someone else's modifications as a jumping off point for sizing. But my modifications are as follows: Cast on 43 (20-3-20). Work 31 repeats. Decrease 10 repeats. Work 30 repeats. Increase 10 repeats. Work 31 repeats. Graphed together the ends. Total of 112 stitches.  Worked about 5 inches from the bottom of the forehead band. Decreased with no plain knit rounds in between (K 14, K2TOG...K 13, K2TOG...etc.). Looks kind of silly, but it's what my dad asked for. Kind of reminds me of an old football helmet. Pattern: 1898 Hat  by Kristine Byrnes Needle Size:  US 7 - 4.5 mm Yarn:  Knit Picks Wool of the Andes Tweed

Christmas Truck Card

Image
I needed a masculine Christmas card and I had this idea rolling around in my head for a few weeks, now. I LOVE how this came out. I stamped my images with Distress Inks and then watercolored them, using the stamped lines (I then stamped over them again to bring back the lines after they were dry). I then quickly watercolored a background, also using Distress Inks. I die cut a square window and the birch trees. I adhered the birch trees to the back of the window panel and the truck to the front. At this point, I remembered I needed to stamp my sentiment, so I quickly did that, using my MISTI to make sure it was stamped correctly. I popped up the window panel with foam tape and then adhered to the watercolored background. I adhered everything to my card base, finishing things off with a quick brush of my shimmer pen on the leaves of the birch trees and some white gel pen on the windows of the truck. I love the overall softness of the card. Products Used: Honey Bee Little Pickup